The Game Plan:
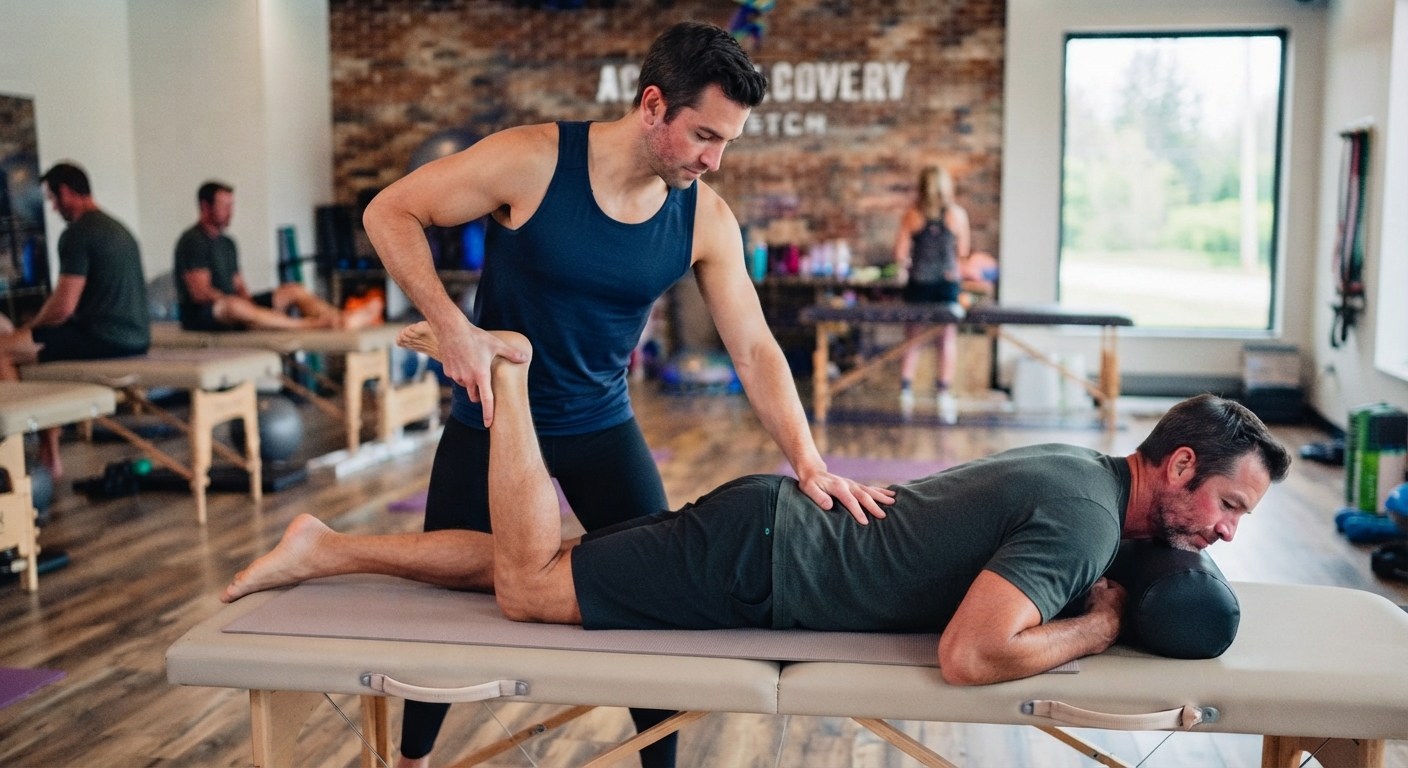
Assisted stretching exercises can make stretching feel more controlled and purposeful because external support helps you reach a deeper stretch without forcing your body into an awkward position. Instead of stretching solo and guessing whether your technique is correct, you can work with a trained professional, partner, or machine to improve movement, flexibility, and recovery.
From my experience, the biggest benefit is often not simply getting a deeper stretch, but learning how your body responds to different levels of pressure, range, and intensity. Personal trainers can use this approach with clients who need better overall movement quality, especially when self-directed stretching has not produced the desired results.
Different techniques may also support the body against common movement-related strains when performed safely and consistently. These methods can be used at home with a partner-assisted stretching setup, a towel, or a little creativity, making assisted stretching a practical part of a regular professional approach as well as everyday fitness.
Who Should Try Assisted Stretching Exercises?
Assisted stretching exercises can suit many people, especially those with tight muscles or limited flexibility who want to improve range of motion without relying on guesswork. Athletes, fitness enthusiasts, sports enthusiasts, and professional athletes may use assisted methods to support performance, recovery, and functional performance.
They can also help gym-goers working on flexibility training and movement quality, strength trainees dealing with stiffness after heavy loading and office workers. Older adults may find gentle stretching useful for balance, joint health, active range of motion, daily function, and independence.
Extra care is needed when muscle pain, joint pain, or an injury is involved. People with minor injuries should get medical clearance, while those with acute injuries, recent surgery, severe pain, or certain health conditions should first speak with a physical therapist or another healthcare professional. This helps ensure that assisted stretching is appropriate and does not interfere with recovery.
The Top 15 Assisted Stretching Moves You Can Do at Home
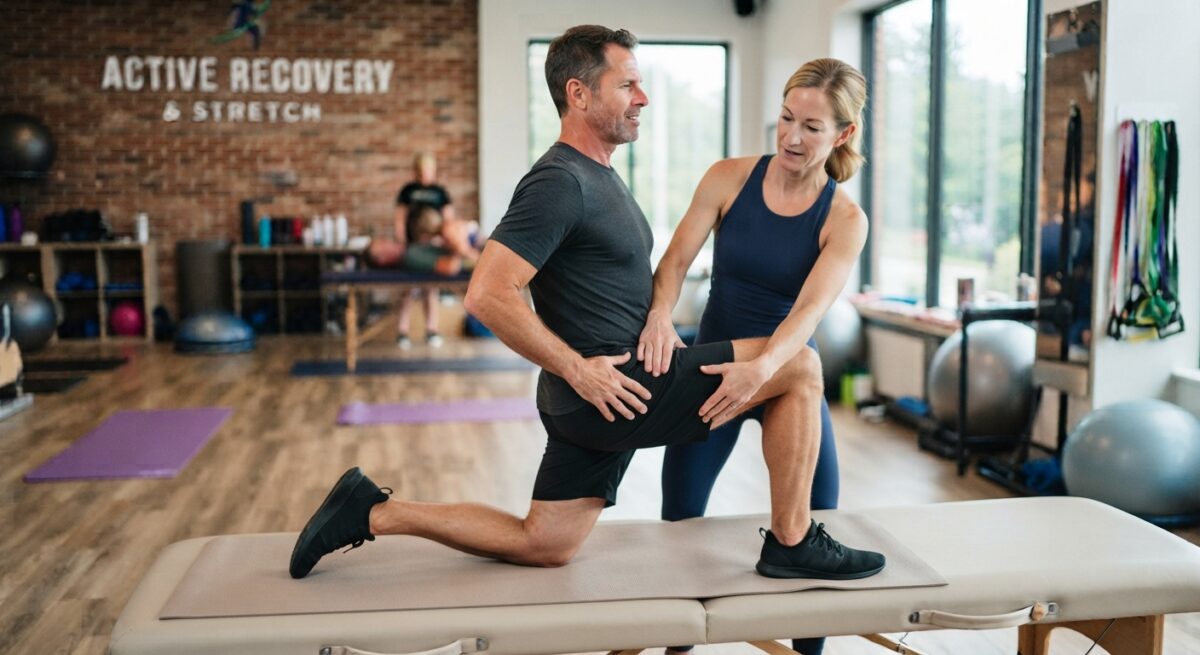
Assisted Hip Flexor Stretch (Half-Kneeling)
- Client position: Start in a half-kneeling position with your rear knee resting on the floor. Keep your front foot planted and your hips facing forward.
- How to do it: A partner or trainer can gently stabilise your pelvis while you slowly move your hips forward. Keep your core steady and avoid excessive lower back arching. You should feel the stretch at the front of the hips, not sharp pain in the spine.
- Hold and repeat: Hold for 20–30 seconds and repeat 2–3 times per leg. This is especially useful for desk-based clients with anterior pelvic tilt, lower-back stiffness, or tightness linked to prolonged sitting and repetitive lifestyle habits.
Assisted Chest and Shoulder Stretch (Seated)
- Client position: Sit upright with your arms behind the body. Keep your chest open and shoulders relaxed rather than forcing them backward.
- How to do it: A trainer or partner can support your forearms and slowly guide you into controlled shoulder extension. The goal is gentle movement, especially for people with rounded shoulders or postural imbalances.
- Hold and repeat: Hold for 20–30 seconds while breathing normally. This can support shoulder mobility, posture, and comfortable upper-body training mechanics.
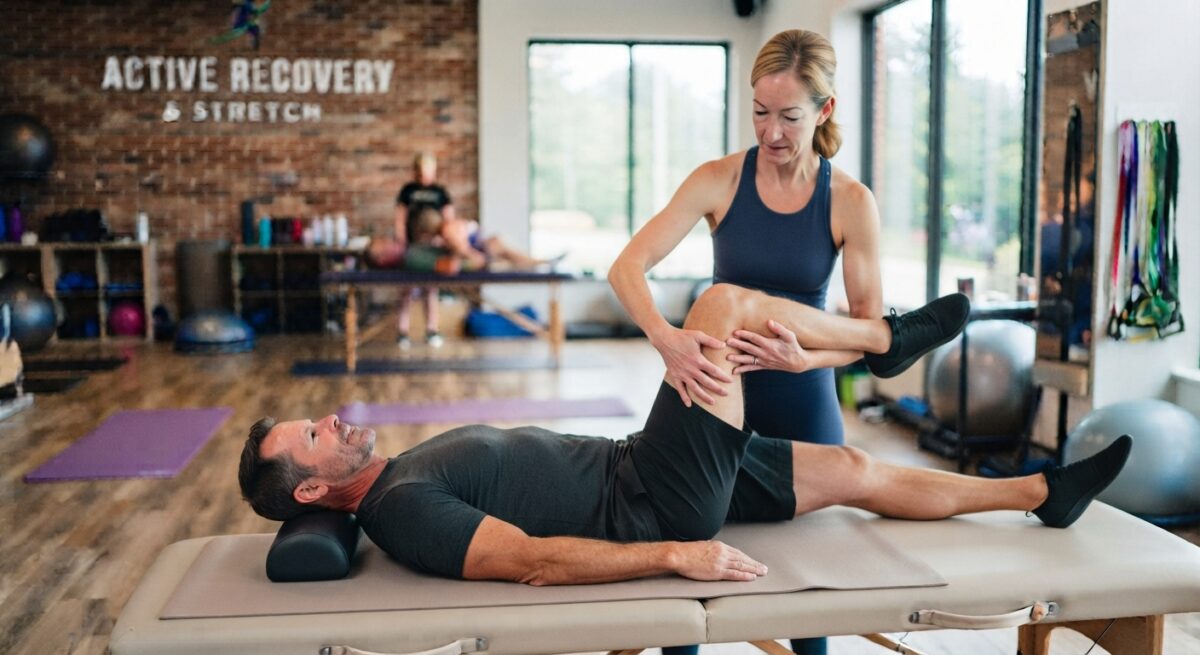
Assisted Glute Stretch (Supine Figure-Four)
- Client position: Begin lying on the back with one ankle crossed over the opposite knee. Keep the supporting foot stable on the floor.
- How to do it: A trainer or partner applies gentle pressure to guide the hip into external rotation. Move slowly and stop before the stretch becomes painful. This is helpful for hip tightness and restricted rotation.
- Hold and repeat: Hold for 20–30 seconds and repeat as comfortable. Regular practice can support hip function and gait economy.
Assisted Calf Stretch (Supine or Standing)
- Client position: Perform this supine or standing, keeping the heel supported. A partner should help maintain a stable knee while guiding the foot.
- How to do it: The trainer gently guides ankle dorsiflexion while keeping the movement smooth. Do not bounce or force the ankle beyond a comfortable range.
- Hold and repeat: Hold for 20–30 seconds. This can be useful for runners and lower-body dominant trainees because improved ankle mobility may support stride length and maximal walking speed.
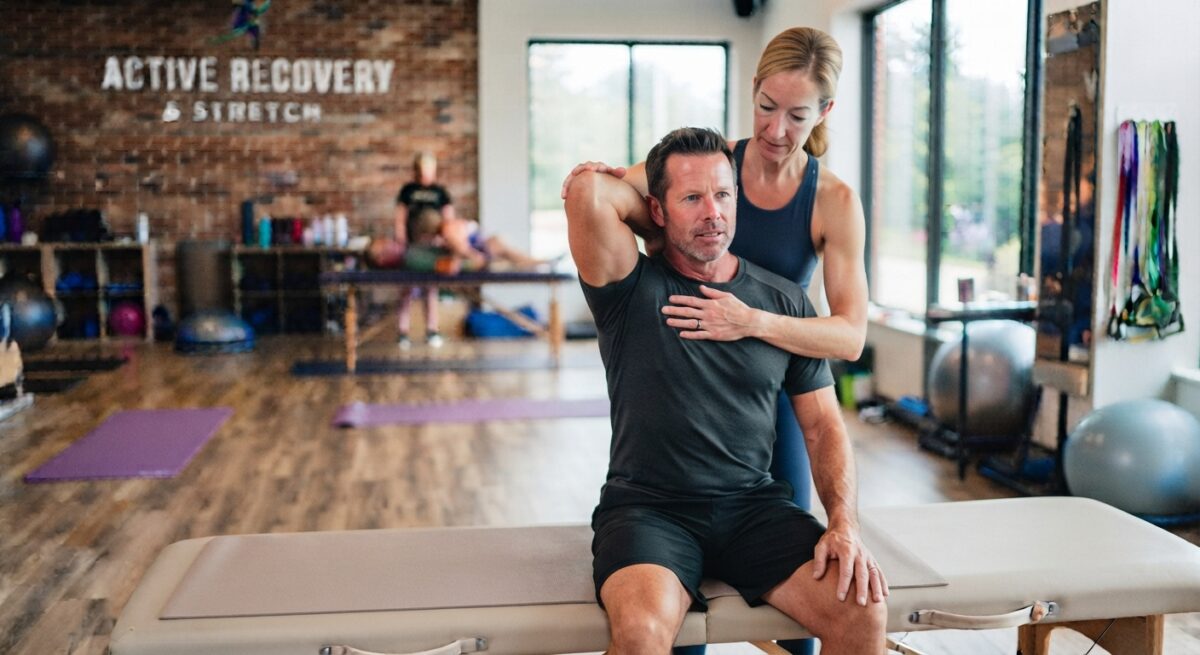
Assisted Triceps Stretch (Seated or Standing)
- Client position: Sit or stand with your arm overhead and the elbow bent.
- How to do it: A partner supports the elbow and gently guides the arm deeper into flexion. Keep the movement controlled, especially if you have limited shoulder mobility.
- Hold and repeat: Hold for 20–30 seconds without forcing the joint. This stretch can make overhead movements more comfortable and support upper-body training and general training comfort.
Partner Hamstring Stretch
- Set up: Lie comfortably on your back with one leg extended straight and the other leg bent, with the foot flat on the floor. Your partner stands near your feet.
- How to do it: Lift the straight leg toward the ceiling. Your partner places their hands behind your calf or ankle and slowly moves the leg toward your chest, keeping the knee straight. Communicate clearly about how the stretch feels. This is a cooperative effort, not a test of endurance.
- PNF option: At your comfortable limit, gently press your heel into your partner’s hands for an isometric contraction lasting 5–10 seconds. Then relax, allowing your partner to guide you into a new range.
- Hold and repeat: Hold the final stretch for 20–30 seconds and repeat 2–3 times per leg. For most people, a deep stretch that feels satisfying is enough; around 6 or 7 out of 10 on a discomfort scale can be reasonable, but never push through sharp pain or searing pain.
- Why use it: Tight hamstrings are common with prolonged sitting and can contribute to lower back pain. This move targets the hamstrings, supports optimal hip mobility, may ease lower back discomfort, and helps free the posterior chain.
Assisted Hip Flexor Stretch
- Set up: Kneel on one knee, such as the right knee, with your left foot flat in front of you. Aim for roughly a 90-degree angle at both knees.
- How to do it: Your partner stands behind you and supports the back hip. Slowly lean forward while engaging your glutes. You should feel the stretch through the front of your right hip. Your partner can place gentle pressure on the right glute to deepen the stretch.
- Safety: Keep your core engaged and avoid excessive lower back arching. A controlled position is more useful than forcing a greater range.
- Hold and repeat: Hold for 20–30 seconds and repeat 2–3 times per leg. This move can counter the effects of prolonged sitting, improve hip mobility, and reduce lower back tension and everyday nagging discomfort associated with poor posture.
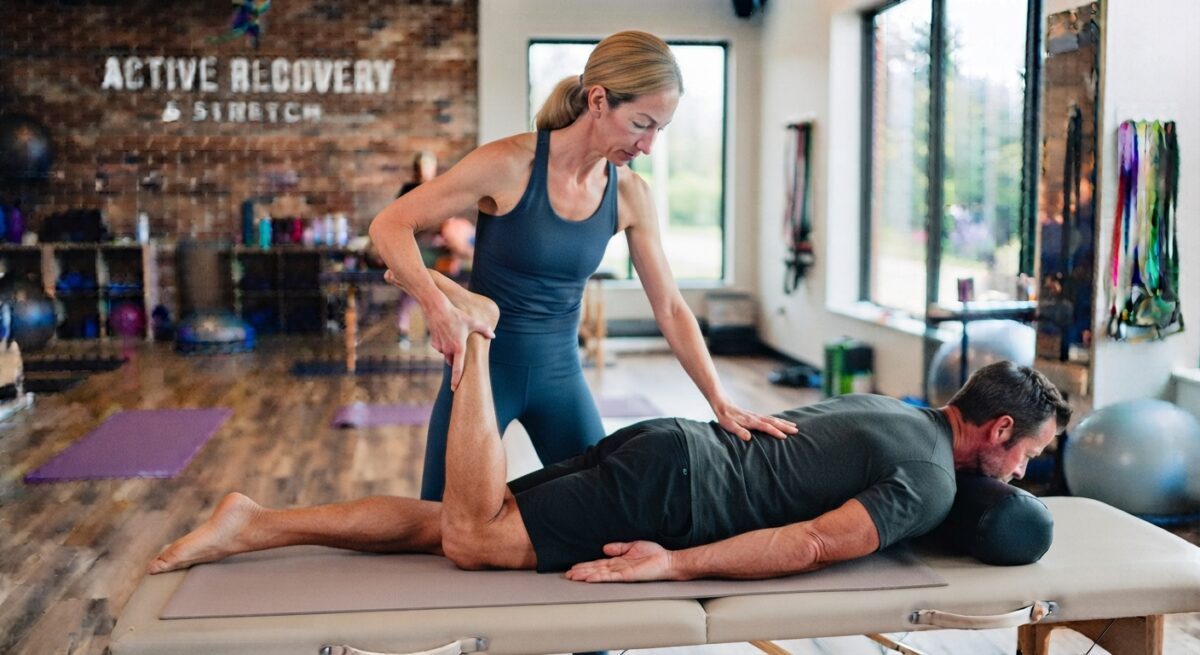
Assisted Quad Stretch
- Set up: Lie on your stomach in a relaxed position. Your partner stands near your feet and carefully bends one knee while holding the ankle.
- How to do it: The partner slowly brings your heel toward your glute while keeping your hip flat on the floor. This helps isolate the quadriceps at the front of the thigh. Avoid rushing the movement.
- PNF option: Gently try to straighten the leg against your partner’s hand for 5–10 seconds, then relax while your partner guides the leg into a new range.
- Hold and repeat: Hold for 20–30 seconds and repeat 2–3 times per leg. This can release tension, support knee health, and improve leg flexibility, particularly after running, cycling, or daily stair climbing.
Assisted Spinal Twist
- Set up: Lie on your back with your arms extended to the sides in a T shape and your palms up. Bend both knees and keep your feet flat on the floor.
- How to do it: Let both knees slowly fall to one side, such as the right. Your partner can place a hand on the top knee and gently encourage a deeper twist while your shoulders remain firmly on the floor.
- Hold and repeat: Hold for 20–30 seconds and repeat 2–3 times per side. This supports spinal mobility and spinal rotation, while helping ease lower back stiffness and supporting better posture.
Partner Chest Opener
- Set up: Stand or sit tall with your arms extended to the sides and your palms facing forward or slightly behind you.
- How to do it: Your partner stands behind you and gently holds your forearms or wrists. They slowly pull your arms back and slightly upwards, creating a broad stretch across the chest and front of the shoulders.
- Hold and repeat: Hold for 20–30 seconds and repeat 2–3 times. This can counter slouching caused by desk work, driving, and daily habits while improving flexibility in the chest and upper body stretch areas and supporting better posture.
Calf Stretch with Partner
- Set up: Sit on the floor with one leg extended straight in front of you. Your partner sits facing you.
- How to do it: The partner places their hands on the ball of your foot, just below the toes, and gently pushes the foot toward your shin while keeping a straight knee. This directly targets the calf.
- Hold and repeat: Hold for 20–30 seconds and repeat 2–3 times per leg. Better ankle flexibility and ankle mobility can support efficient walking, running, gait, and balance, while helping reduce some foot issues and lower leg issues.
Assisted Glute Stretch (Figure-Four)
- Set up: Lie on your back with both knees bent and feet flat. Cross one ankle over the opposite knee, such as the right ankle over the left knee, creating a figure-four shape.
- How to do it: Your partner places their hands behind the thigh of the bent leg and slowly pulls the bent leg toward your chest. You should feel the stretch in the glute on the side of the crossed leg.
- Hold and repeat: Hold for 20–30 seconds and repeat 2–3 times per side. This targets the glutes and piriformis muscle, supports hip mobility, and may help people experiencing sciatica-like symptoms, hip comfort, or lower back comfort.
Self-Assisted Inner Thigh (Adductor) Stretch
- Set up: Sit on the floor with the soles of your feet together and your knees bent out to the sides in a butterfly stretch position.
- How to do it: You do not need a partner for this self-assisted movement. Use your own body for assistance by placing your elbows against your inner thighs or knees and gently pressing to help the hips open.
- Hold and repeat: Hold for 20–30 seconds and repeat 2–3 times. This targets the inner thighs and adductors, supporting hip mobility, hip health, balance, and unrestricted lower body movement.
Wall-Assisted Pec Stretch
- Set up: Stand in a doorway or beside a sturdy wall. Place your forearm flat against the doorframe or wall with your elbow at shoulder height and bent to a 90-degree angle.
- How to do it: Step forward with the opposite leg to the arm on the wall. Allow your body to rotate slightly away from the arm until you feel a controlled stretch across the chest and front of the shoulder.
- Hold and repeat: Hold for 20–30 seconds and repeat 2–3 times per side. This self-assisted stretching option targets the pectoralis muscles, which can become tight from prolonged sitting and upper body exercises, and can support improved posture and address rounded shoulders.
Foam Roller Thoracic Extension
- Set up: Lie on your back with a foam roller positioned horizontally across your upper back, just below the neck. Support your head gently with your hands and keep your elbows somewhat close.
- How to do it: Slowly extend your upper back over the foam roller, allowing your head to move gently toward the floor. You can slowly roll a few inches up and down to massage the muscles. The foam roller works as a useful prop, although this is not strictly assisted by another person.
- Hold and repeat: Perform 8–10 slow repetitions or hold the extended position for 20–30 seconds. This form of myofascial release can be done at home and may improve thoracic spine mobility, ease stiffness, reduce neck tension and shoulder tension, and support posture and spinal health as part of a full-body assisted stretch routine.
Tips for Doing Assisted Stretching Exercises Safely
- Communicate clearly: The person being stretched should continuously communicate how the stretch feels. Using a scale from 1 to 10, aim for a good stretch around 6 or 7, never unbearable pain. Sharp pain or searing pain means stop immediately and give clear feedback to your partner or trainer.
- Go slow and steady: Keep the stretch gentle and avoid a yank, bounce, or sudden force. Use gradual movements, controlled movements, and fluid movements rather than forcing the body into position.
- Listen to your body: Pay attention to your body and muscles. If you feel sharp, shooting, or radiating pain, stop immediately. A gentle pull or lengthening pull is expected; stronger pain is a warning sign.
- Warm up first: Avoid stretching cold muscles. Start with a light cardio warm-up for 5–10 minutes, such as brisk walking, cycling, or light jumping jacks, to increase blood flow and make muscles more pliable and less prone to injury.
- Use proper form: Both the partner and the person stretching should thoroughly understand the correct form for each stretch. A reputable video tutorial can help you understand the movement and safety before starting.
- Trust your partner: Work with someone you trust to respect your limits and respond to feedback instantly. This is especially important when a person or machine is helping move your body through a stretch.
- Breathe and stay relaxed: Breathe deeply throughout each stretch and avoid forcing the movement. Let the stretch happen gradually, using light movement or dynamic exercises when appropriate.
- Keep dynamic work controlled: For dynamic formats, keep each movement brief, holding each stretch for 2–3 seconds and repeating 8–12 times. Warm up first and follow these guidelines when using assisted stretching exercises.
Summary
The goal of assisted stretching exercises is to help you care for your body while working with tension, stiffness, or limited mobility. Whether you are an athlete, a desk dweller, or simply want to improve flexibility and feel your best, assisted stretching can offer expert guidance, deeper results, and a feel-good experience. From my experience, the biggest benefit comes from treating stretching as a steady part of movement rather than something you rush through only when your body feels tight.
This practical guide has covered useful assisted stretching moves you can try at home, explained the “why” behind the stretch, and shared simple “how-to” techniques while addressing common questions with clarity and care. The aim is to help you feel inspired throughout your journey toward comfortable movement and fluid movement.
Flexibility is not only about touching your toes; it can help with moving through life with greater ease, managing everyday muscular tension, and supporting injury prevention through better movement awareness. Whether you work with a partner for deeper stretches or use self-assisted methods, consistency matters. Move gently, listen to your body, and notice your progress over time.
FAQ’s
Do I need to be flexible to try assisted stretching exercises?
No, you do not need a special starting point or high flexibility level. Assisted stretching exercises can help you improve flexibility gradually, making stretching easier as your body adapts.
How long is a typical assisted stretching session?
An assisted stretching session can vary in duration, with 25-minute, 50-minute, and 75-minute sessions available in different formats. Stretch*d uses these options based on how much depth you want from your stretching.
Can I do assisted stretching exercises after a workout?
Yes, assisted stretching exercises can fit well after a workout as part of your recovery routine. A gentle session can help you cool down, promote circulation, and manage post-workout soreness.
Will I feel sore afterward?
Some mild soreness or tightness can happen after stretching, especially if your body is not used to being stretched. Normal soreness should not feel like sharp pain, and giving your body time for recovery is important.
How soon will I notice the results?
You may feel looser and more mobile after your first session, but lasting results usually take consistency. Around 1–2 sessions per week can support gradual mobility, flexibility, and overall progress.